Custom bot setup
You can set up a custom bot using the marCloudBackup Panel, which allows you to create a fully customized backup bot for your server, with your own branding and discord bot client.
Additionally, this lets you fully control the bot's users and permissions, since you don't use the shared bot instance everyone uses.
To create a custom bot, click the + button in your dashboard.
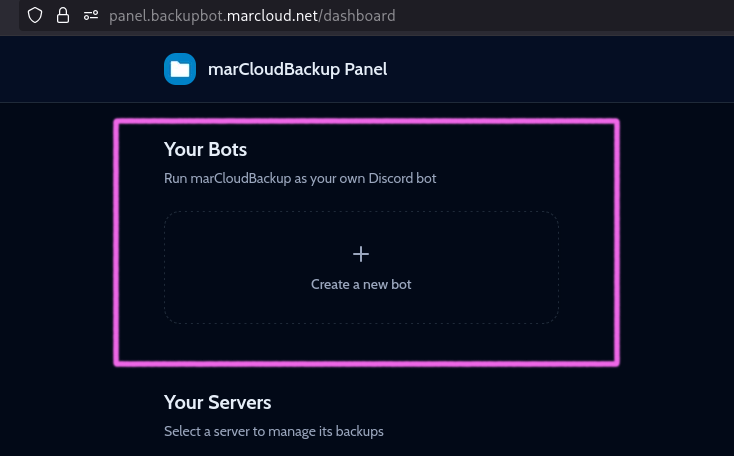
Then, proceed with the setup wizard, which will guide you through the process of creating a new bot application on Discord, and linking it in the marCloudBackup Panel.
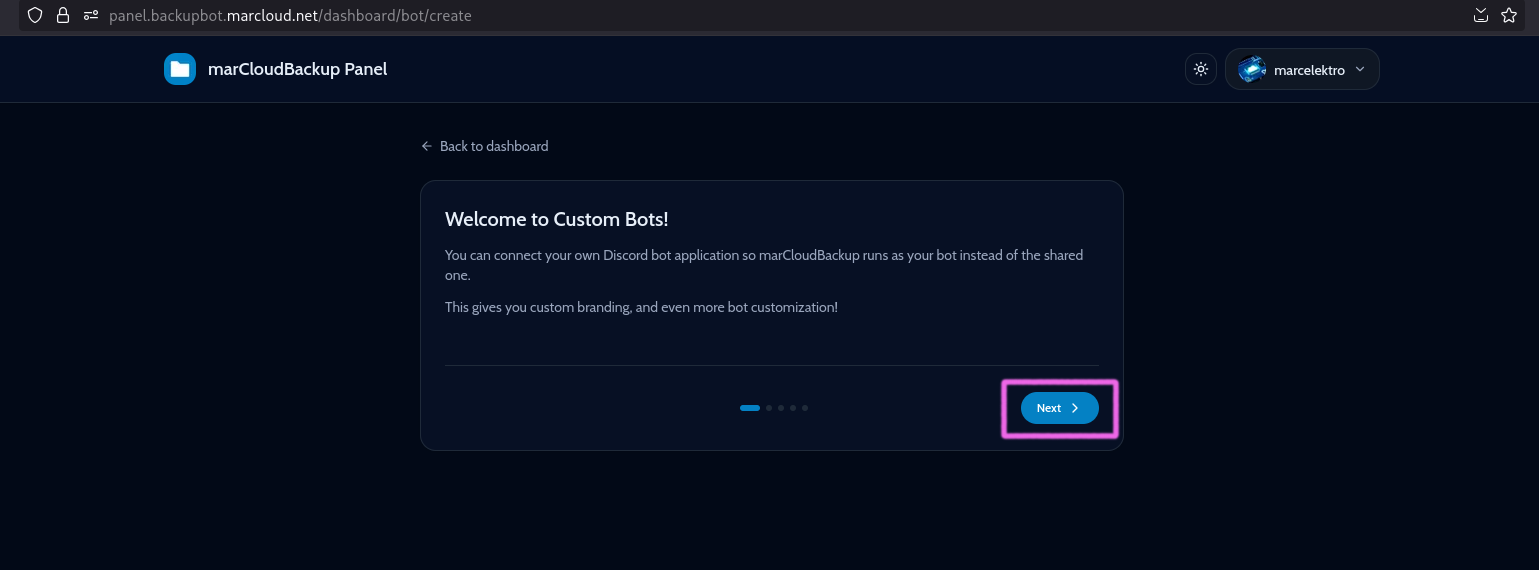
Creation of the bot application
What you need to return to the panel with: Client ID and Bot Token.
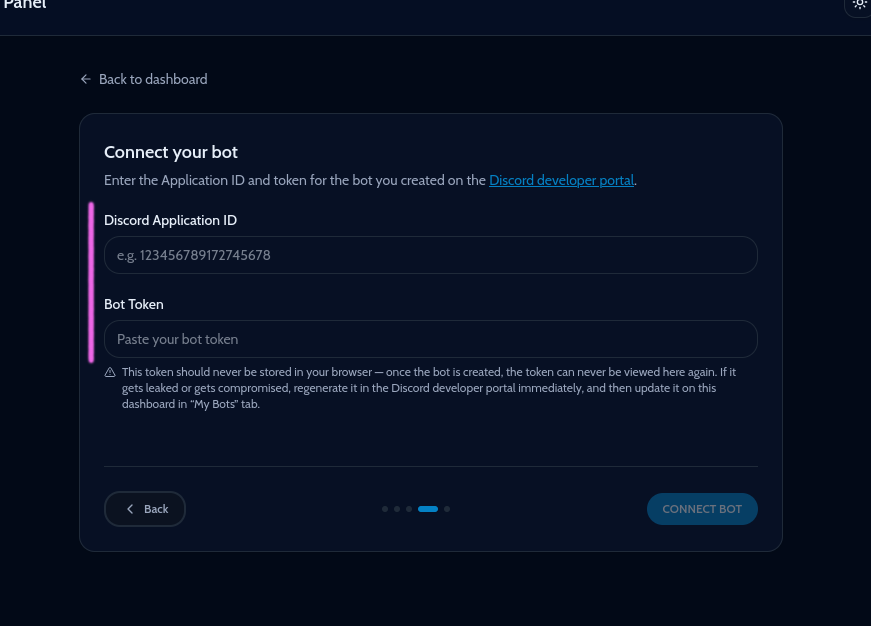
Create the bot on Discord
Start by navigating to the Discord Developer Portal and creating a new application. Alternatively, you can use an existing bot if you have one.
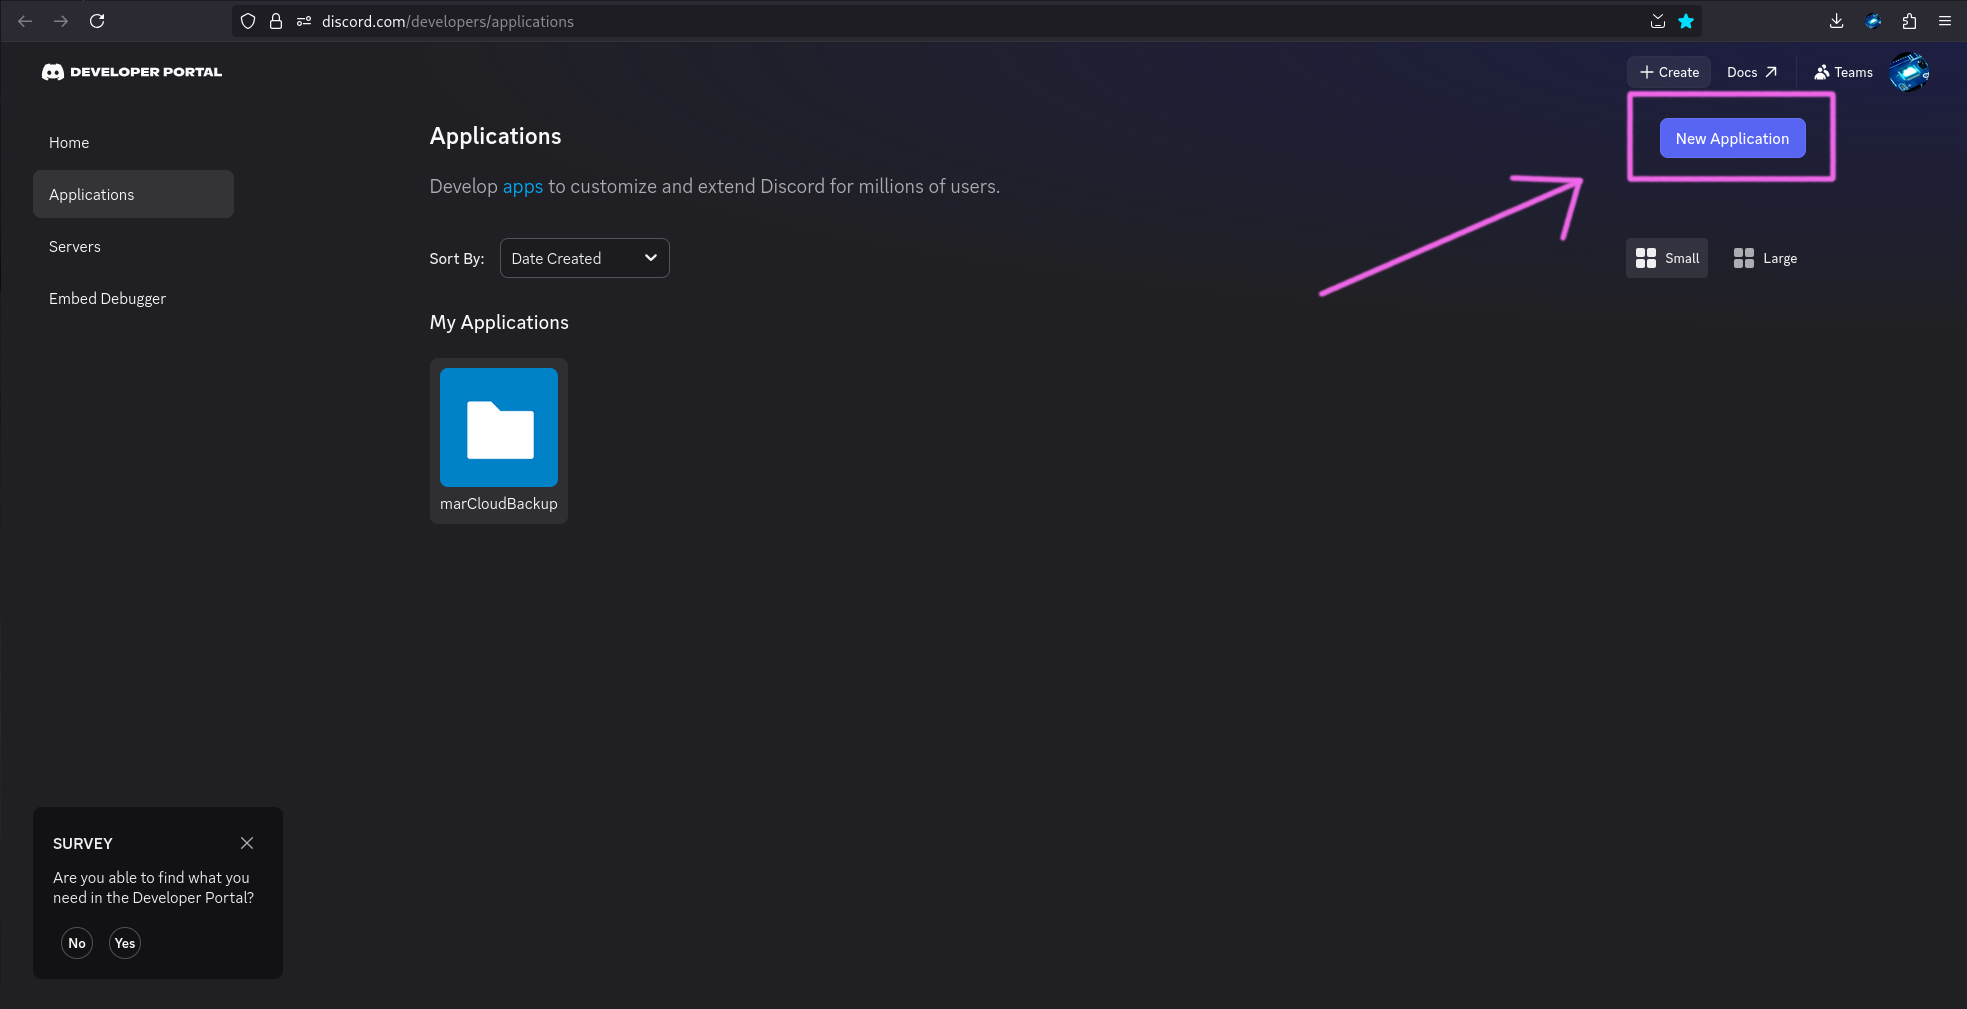
Click New Application, give it a name, and click Create.
The application name is your desired bot's name. It can be anything really, e.g. "My Server Backup".
Customize the bot and get ID
After creation, the application will be created, and you will be redirected to the General Information page.
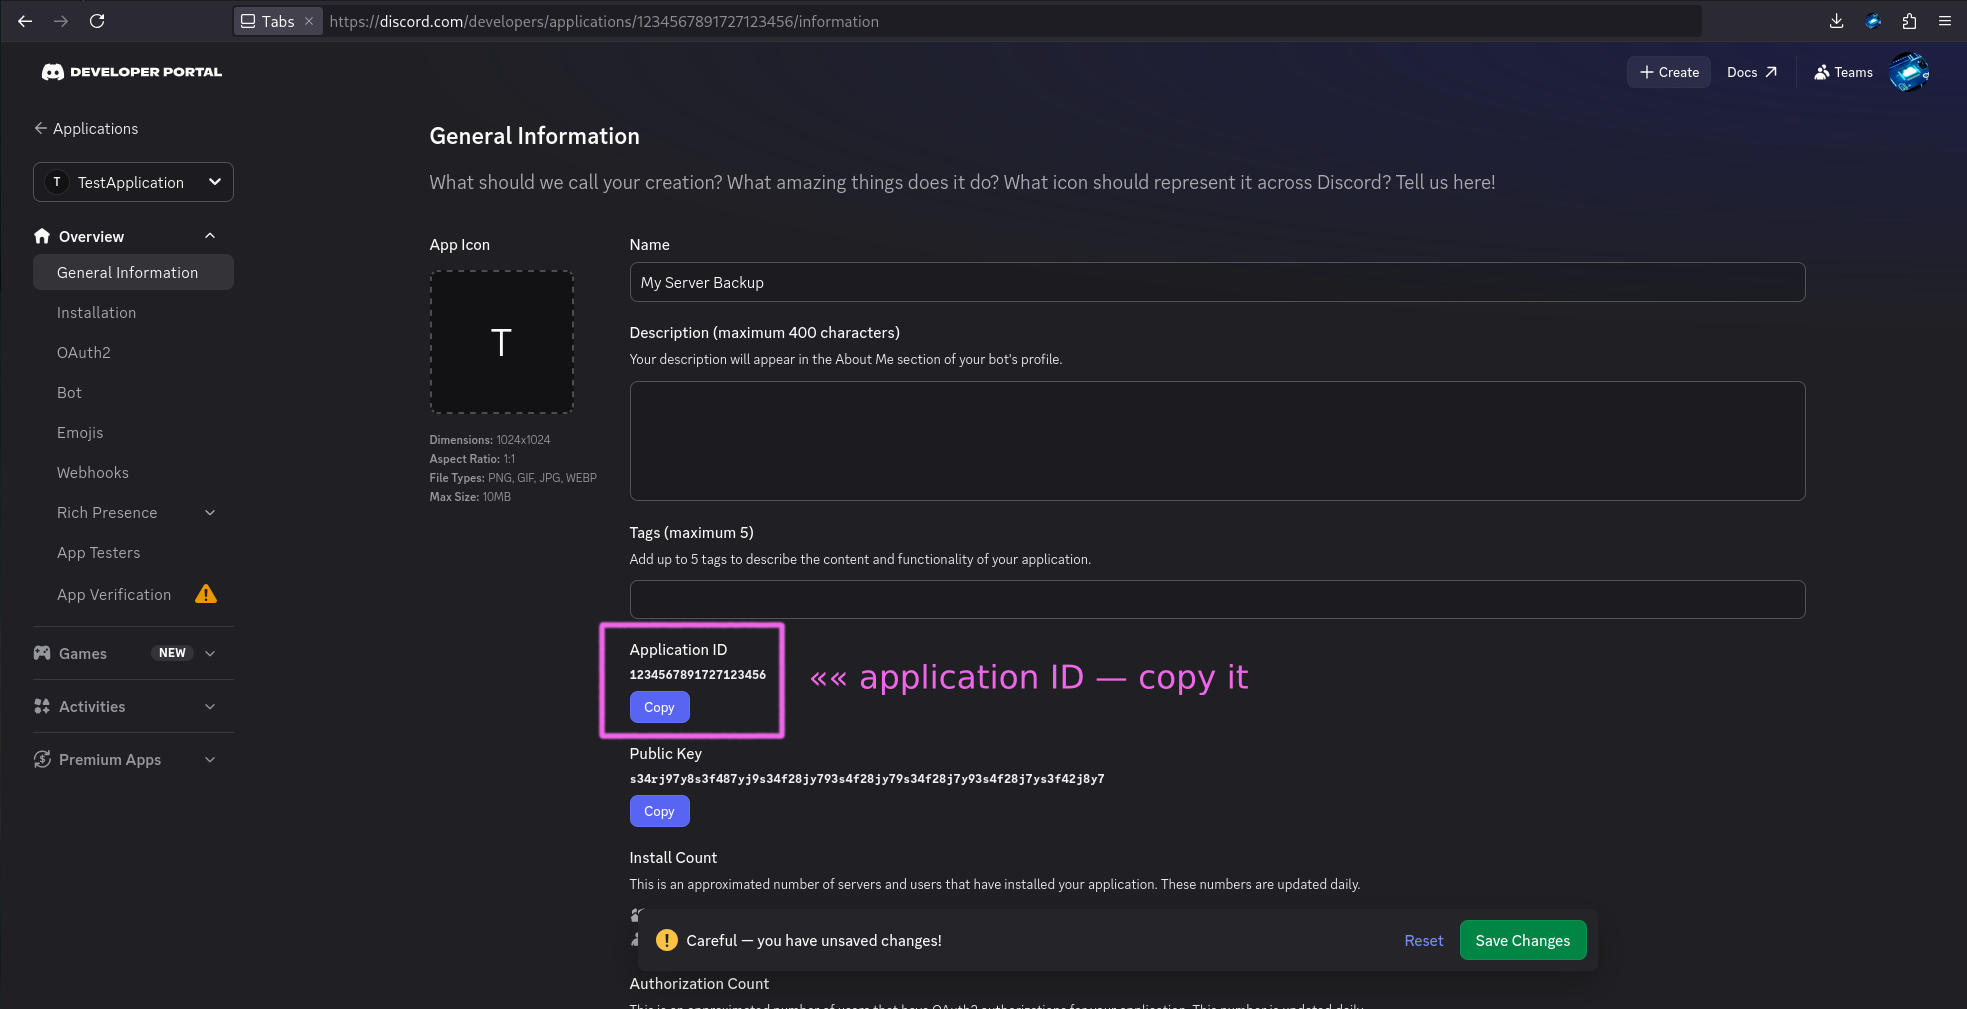
On this page you can already copy the Client ID and paste it into the marCloudBackup Panel setup wizard. This avoids a round-trip to this page later on for a quicker setup :)
Get the bot token and enable intents
Once your bot is customized and beautifully branded, navigate to the Bot tab in the left sidebar.
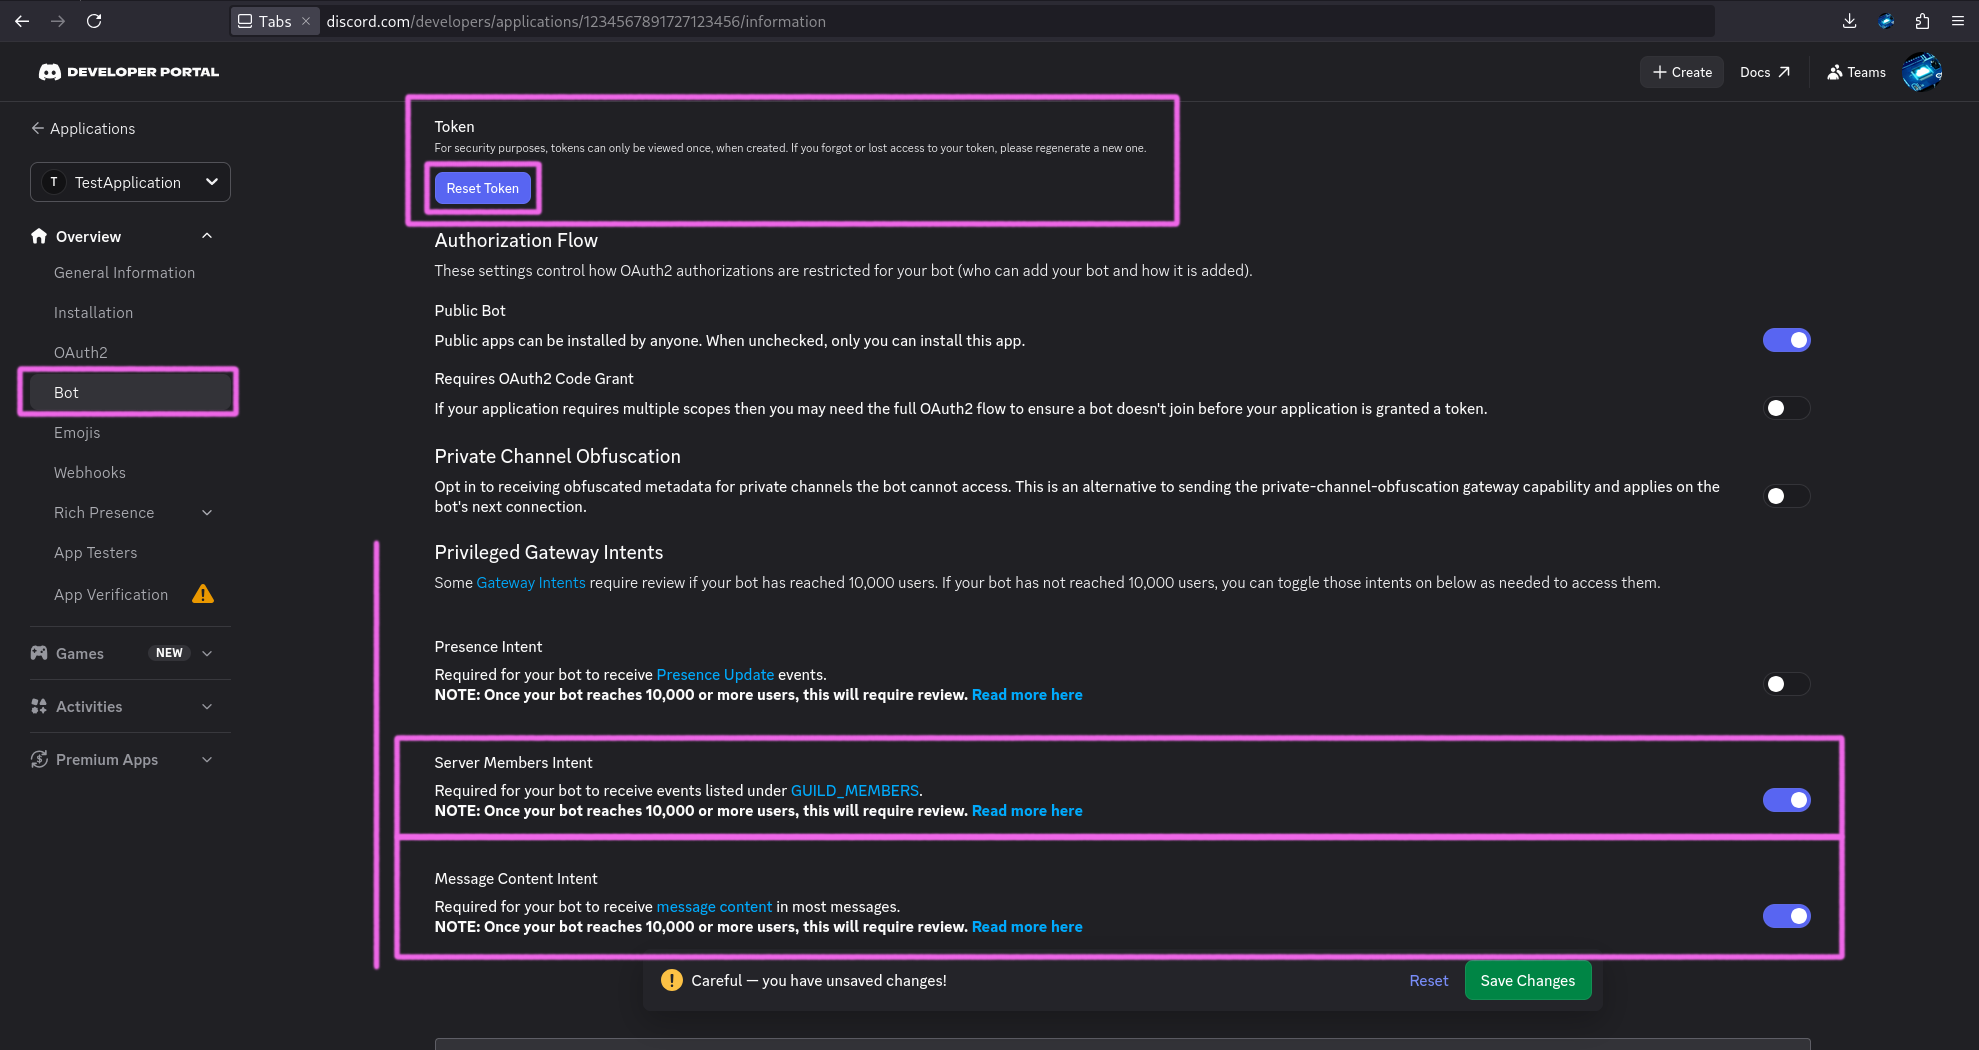
Obtain the bot token
To get the token, you need to click the Reset Token button. Discord might ask you to authorize with 2FA if you have it enabled. Then your token will be reset (created if done first time, effectively) and shown to you.
Copy it and paste it into the marCloudBackup Panel setup wizard.
For security reasons, make sure to wipe the token from your clipboard once it's pasted into the panel setup wizard (to avoid e.g. pasting it somewhere else by accident).
First you can copy anything else, e.g. this text here to overwrite the token in your clipboard.
On Windows, if you have clipboard history enabled, you can remove it by pressing Win + V and removing the token from the clipboard history.
On Linux, it depends on your desktop environment, and you most likely know how to do that as a fellow Linux user. If not, look it up and learn something new ^_^.
Enable the required intents
With the token being copied, proceed with enabling the Message Content Intent and Server Members Intent in the Privileged Gateway Intents section.
Intents explanation:
-
Message Content Intent: This intent is required for the bot to read the content of messages in your server, which is necessary for creating backups of messages. Without this intent, the bot will not be able to save message content, and thus your backups will be incomplete.
-
Server Members Intent: This intent is required for the bot to read the member list of your server, which is necessary for creating backups of members and their roles and nicknames.
Proceed with the setup wizard
It should now look like this in the setup wizard:
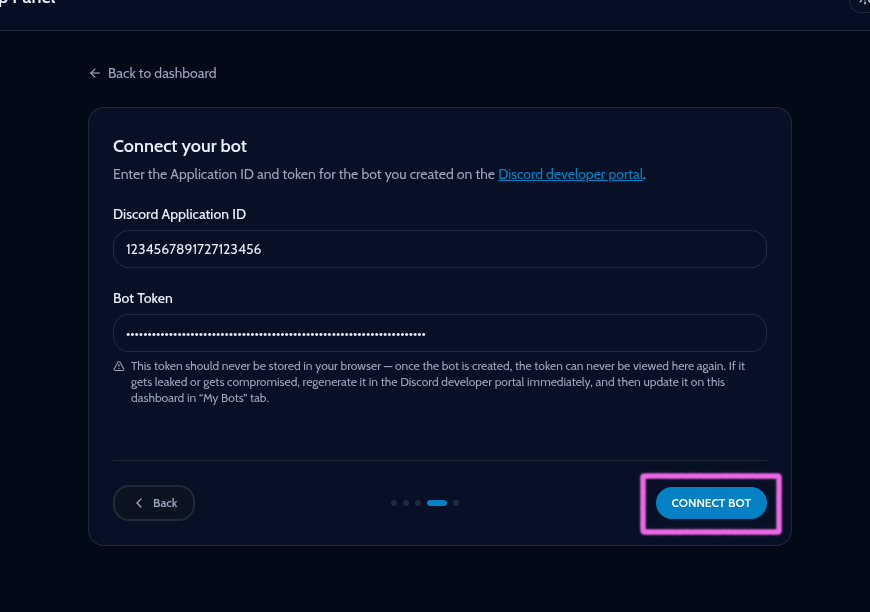
Click Connect Bot to authorize marCloudBackup with your bot application and ensure it can correctly access the bot.
If your intents were not enabled correctly or the token is invalid, you will see an error message and will need to fix the issue before proceeding.
Invite the bot to your server
Once the bot connects successfully, you will be redirected to its management page.
Managing the bot
You can conveniently manage everything about your custom bot in the marCloudBackup Panel.
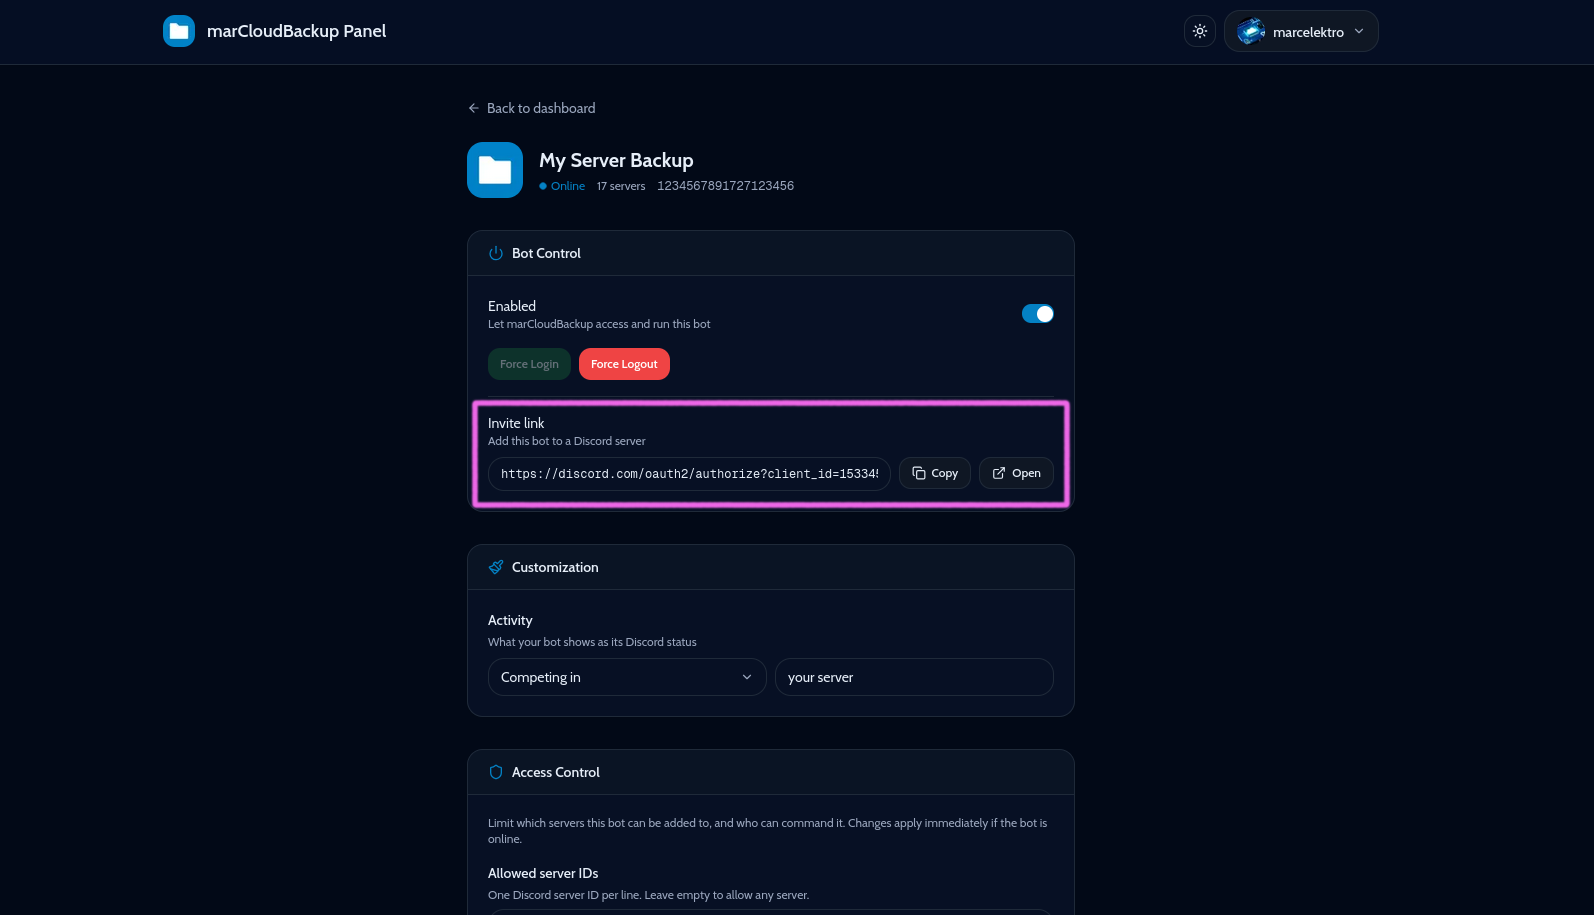
To invite the bot, copy or open the Invite link, and authorize the bot in your server like any other bot.
Delete the bot
If you want to detach your bot from marCloudBackup, you can delete it from the panel. This will not delete the bot application on Discord, but unlink it from marCloudBackup.
Scroll down to the bottom of the bot management page, and click Delete Bot.